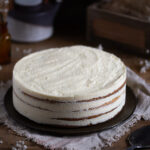
Polish Honey Cake with Semolina Buttercream
Lovely layers of honey cake filled with semolina buttercream make up this Polish honey cake known as grysikowiec or miodownik.
Servings 16 people
Calories 542kcal
Equipment
- 24-cm (9-in) baking tin
- Food processor
- Mixing bowls
- Electric mixer
- Pot
- Spatula and spoons
- Cooling rack
- Hand whisk
- Cake collar
Ingredients
For the honey cake layers
- 500 g flour
- 2 eggs
- 1 teaspoon baking soda
- 100 g honey
- 50 g butter cold
- 100 g sugar
- 100 g sour cream
For the semolina buttercream
- 1 l milk
- 2 tablespoon vanilla extract
- 140 g semolina
- 350 g butter room temperature
- 400 g sugar
- 4 egg yolks
Instructions
1. Semolina Buttecream
- Combine the milk and vanilla extract in a pot and bring to a boil, then slowly add the semolina stirring continuously. Simmer for 4-5 minutes until the mixture thickens. Lower the heat if you feel that it sticks to the bottom of the pan. Let it cool completely, to room temperature.
- Add the egg yolks and sugar to a bowl and mix with an electric mixer at medium speed for 2-3 minutes. Slowly add the room temperature butter, little by little, always mixing at medium speed. You may need to scrape the sides of the bowl from time to time to ensure everything gets mixed homogeneously.
- When the butter has been incorporated, add the cooled semolina little by little, again scraping the sides of the bowl if necessary. Stop the mixer as soon as all the semolina has been added. Transfer the cream to a piping bag fitted with a round attachment (or just a round hole, really).
2. Honey Pastry
- Combine flour, eggs, baking soda, cold butter, honey, sugar and sour cream in a food processor and blitz until combined. Stop the blades from time to time and scrape the sides of the bowl.
- Divide the dough into 4 equal parts. Roll out each portion on a floured surface and cut out according to desired size (use a baking ring or cutter of the same size as reference).
- Bake each layer individually at 200°C (390°F) for 10 minutes. Remove from the oven and transfer to cooling rack. The pastry will slightly harden as it cools.
3. Assembling the Cake
- Line the inside sides of a baking tin with a cake collar or with strips of baking paper. Place one disc at the bottom of the form. Pipe enough cream to cover the whole disc all the way to the outer edges, going in a spiral.
- Place next pastry disc and gently press it to distribute the cream under it. Pipe the next layer of cream. Proceed this way until you have used all 4 discs. I had divided my cream between 2 pastry bags and used half for each layer.
- Flatten the cream on the top layer, if you prefer a smoother finish. Place the cake in the fridge to cool and set for a minimum of 4 hours. For best results, leave it overnight, so the pastry discs have enough time to moisten and soften.
Notes
This cake needs to be stored in the fridge, but tastes best at room temperature. It is recommended to take it out of the fridge an hour or so before serving, for best results.
The nutritional information shared here is obtained using an online calculator and therefore only to be used as a guideline.
Nutrition
Calories: 542kcal | Carbohydrates: 70g | Protein: 8g | Fat: 26g | Saturated Fat: 15g | Polyunsaturated Fat: 1g | Monounsaturated Fat: 7g | Trans Fat: 1g | Cholesterol: 134mg | Sodium: 267mg | Potassium: 179mg | Fiber: 1g | Sugar: 40g | Vitamin A: 863IU | Vitamin C: 0.1mg | Calcium: 108mg | Iron: 2mg